Raspberry Pi
I often thought about having a Raspberry Pi and doing all kinds of supercool stuff with it. But it took me until last week to actually get one and play with it.
First Steps
Setup
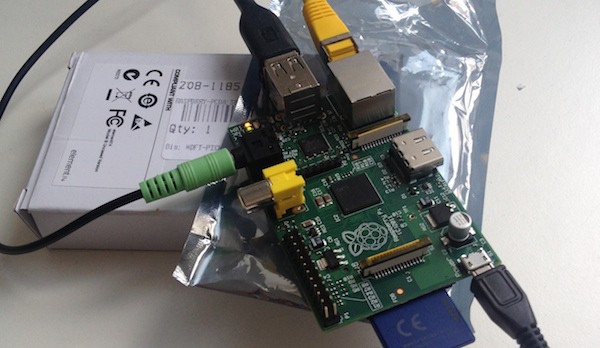
I didn't want to buy any HDMI cables and decided to run it completely headless, meaning I will use it only over SSH and never connect it to an actual display. After putting Raspbian onto a SD card as operating system, I hooked it up to the network. I did buy a Wifi USB Adapter beforehand, but for the configuration process it's easier to go with the wire option.
AirPlay
AirPlay was the first thing I wanted to give a shot. It often bugs me that I have to mess around with the cables when I want to use the notebook on my couch rather than on my desk.
Thanks to ShairPort[1] that's really easy and works like a charm with both my MacBook and my iPhone.
ProTip: If you are not alone in your network, make sure to set a password.
TimeMachine
The next cable on my desk is the one of my external backup hard drive. Why not doing backups over Wifi? It turned out to be a bit more tricky. There are quite a few tutorials on running using your Pi as full-fledged TimeCapsule.
There are quite a few tutorials on this. One of my biggest problems was that the external drive was always getting mounted as read-only. Turns out that if you don't eject the drive correctly the Linux driver won't mount it writable the next time. Although Apple tells one not to do it, disabling journaling seems to fix this problem.
I tried a lot to get TimeMachine accepting my previous backups and continue there. Turns out Mac OSX handles local (= USB) backups way differently than network backups. I didn't find any way to do so and decided to connect my MacBook and the Pi with a LAN cable directly. After doing the initial backup that way, it's no problem to change to wireless later on.
What's next?
Currently the external drive is permanently mounted and powered. I am experimenting a bit with dynamically mounting it whenever my MacBook is in the network.
I stumbled upon GroundControl, a neat control center for the Pi with statistics and the possibility to execute commands. As I am missing a few features I hope to make some time for forking and exiting it a bit.
But for new functionality I don't know what to do next. If you have got some cool idea, send me a message on Mastodon.
Be sure you get version 1.0, at the time of writing it is still in development but has proven to be more reliable on my system. ↩︎
Automatically Sync PhotoStream to Dropbox
The sync behind Apple's photostream is really comfortable. My photos are uploaded when my iPhone has WiFi and my mac downloads them instantly. So when I want to get an image from my phone I just have to tap into the PhotoStream.
But all regular solutions are in some way inconvenient. To access the PhotoStream you have to use the somewhat bloated iPhoto and Dropbox requires you to either start the iOS app or connect your iPhone via USB. None of these options are really comfortable.
Digging into Photostream
Turns out OS X saves the images as regular files, but puts each in a separate subfolder – not that cool for direct use. But at least that's automatically done by a system service, so no need for iPhoto.
In a quick Google search I found an AppleScript that copies images from the PhotoStream to the Dropbox folder. That seemed great until I noticed it freezes the Finder for the duration of the sync.
Copying the PhotoStream into your Dropbox
That's why I came up a little bash script that does the same but it runs faster and doesn't freeze the Finder. You can find it below or on GitHub Gist.
The script just takes all files starting with IMG_ from the PhotoStream folder and copies them into the subfolder photostream of my Dropbox. Make sure you adjust the second path and make the script executable.
cd ~/Library/Application\ Support/iLifeAssetManagement/assets/sub/
find . -name 'IMG_*' -exec cp -n -p {} /Volumes/HDD/max/Dropbox/photostream \;
Additionally I registered the script as a LaunchAgent, so it automatically gets started every 5 minutes. Again, make sure you adjust the paths and save the .plist-File (is.justcurious.photostreamsync.plist) in ~/Library/LaunchAgents/ . (A restart is required to actually register the LaunchAgent.)
<?xml version="1.0" encoding="UTF-8"?>
<!DOCTYPE plist PUBLIC "-//Apple//DTD PLIST 1.0//EN" "http://www.apple.com/DTDs/PropertyList-1.0.dtd">
<plist version="1.0">
<dict>
    <key>Label</key>
    <string>is.justcurious.photostreamsync</string>
    <key>ProgramArguments</key>
    <array>
        <string>/Applications/utils/photostream</string>
    </array>
    <key>StartInterval</key>
    <integer>300</integer>
</dict>
</plist>
Project Locationaire
I rarely have the chance to show what I am actually doing at university. But yesterday was the final presentation of a practical course on iOS development and I'd like to share the result.
Locationaire
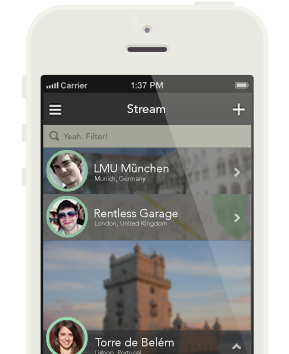
Locationaire is an app to bookmark and share the best locations you discover and share them with your best friends. When you and your friends are traveling around the globe Locationaire allows to easily share the places you discover and to find the places your friends like.
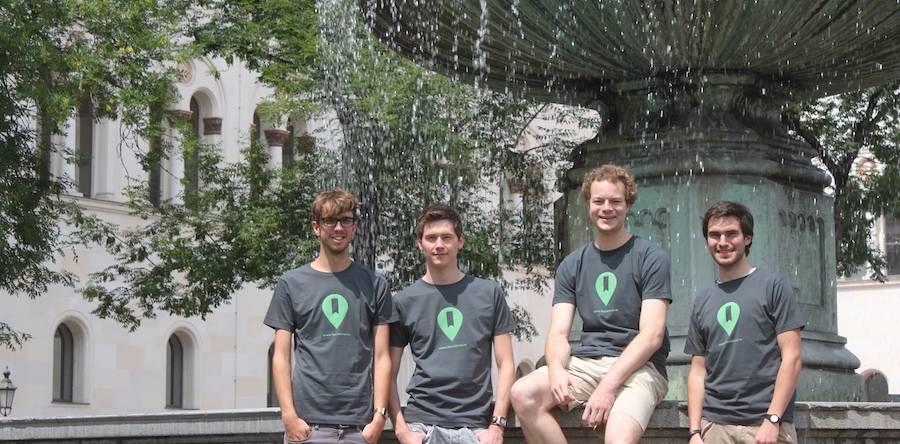
We – Fabian, Felix, Jörg and me – didn't aim to get people to constantly save every location. Instead we focused on getting honest recommendations. Therefore Locationaire doesn't have any global stream or similar functionality but only shows the items of your friends, the people who you trust and whose taste you value.
You can find more information on locationai.re.
Technicalities
For me personally it was the second time I actively developed on iOS and the first time to probably get an actual app out the door. We used Parse as backend and Foursqaure to get locations, which allowed us to mostly focus on the iOS part of the project.
Quo vadis?
At the moment we are happy that we got that far and rocked our presentation. Although we have to catchup with our other courses for now, we plan on bringing Locationaire to the AppStore.
To get if even faster, we start a private beta in the upcoming days. If you are interested feel free to contact us.
Tracking myself
The idea to capture as much data as possible about myself fascinates me. Most of the time I don't have any specific goal in my mind. It is more about looking back and seeing how things evolved over weeks/months/years. Throughout the last couple of years I tried many different approaches and tools. Here is a short overview of the areas I currently track and what I use for it.
Spending: Next
It's easy to automatically track the movements in my bank account. But this hardly mirrors my actual spending habits as I can't figure out where all my cash goes. Next is a sleek iOS app to track on what I actually spend my money.
Sports: Runkeeper
I picked up running once again this year and doing so far much better than in all previous attempts. And finally I can put all those fitness apps to use. I decided to go with Runkeeper mostly because I like their data export options and that they offer an API.
Journaling and everything else: Day One
Day One lives on both my Mac and my iPhone. Generally I try to capture bigger stories about my personal life in there. It's nice to sometimes look back on what obsessed my mind a couple of months ago and how these things actually turned out.
Brett Terpstra's Slogger is a nifty tool that pipes the social webservices of choice into Day One. Such a great tool to preserve all my tweets and checkins in a central place.
Maybe I made this whole entry up as an excuse for pre-ordering the [Fitbit Flex](http://www.fitbit.com/flex).
Switching to Ocotopress
Along with a small refresh of the design, I switched this blog from Wordpress to Octopress. Except for the name these two have actually very few in common. While Wordpress is a blogging system growing into a fully fledged CMS, Octopress is a static site generator.
I do still enjoy developing projects with Wordpress a lot. It's template and theming structure is relatively simple and straightforward (other than Drupal). For most blog-alike things it is the most suitable option.
So I ditched it mostly out of curiosity to try something new. While the admin interface of Wordpress is easy to use, it bugged me to only have the posts in a database on my server. Quite some time ago I have come to love Markdown (and it's extension MulitMarkdown). It allows me to store additional semantic information in plain text files. Yet I can edit and read these files on any available machine without any proprietary software.
Using Octopress I now create all entries locally on my Mac and write them in Markdown. Which makes them also searchable via Spotlight. It comes with a handy deployment functionality which automatically pushes everything to the server. I find this workflow quite enjoyable.
Furthermore this blog has now a new domain (justcurious.is along the previous .de-domain) and yes, I am writing in English.